-
You are here:
Home
›
-
History of South Africa
›
-
The Anglo-Zulu war
The Anglo-Zulu war, the proud Zulu nation
against mighty Great Britain
The undelying motive that gave rise to the Anglo
Zulu war of 1879 was the fact that Great Britain regarded the Zulus and the "Voortrekker boers" as
British subjects.
It made no difference to them that the "Voortrekkers" had moved away from the Cape Colony into
the interior of South Africa in their quest for independence.
As a result the territory they occupied was considered as belonging to the British crown.
So it was, that in the second half of the 1800’s Great Britain saw itself and its two colonies
faced with what they regarded as a threat consisting of two independent "Boer" republics, several
independent African territories and a very powerful Zulu Kingdom, with little control over any of
them.
In an effort to consolidate its power and position, the newly installed British High Commissioner
for South Africa, Sir Henry Bartle Frere was instructed to form a confederationand establish peace.
Sir Henry Bartle Frere saw the strong and economically self-reliant Zulu kingdom as the first threat
that had to be brought under control.
On 11 December 1878, using minor border disputes as a pretence, he sent an ultimatum to Zulu king
Cetshwayo, requesting him to virtually disarm the entire Zulu nation.
The Zulus had no such inclination what so ever and so the Anglo / Zulu war as it is known today,
was under way.
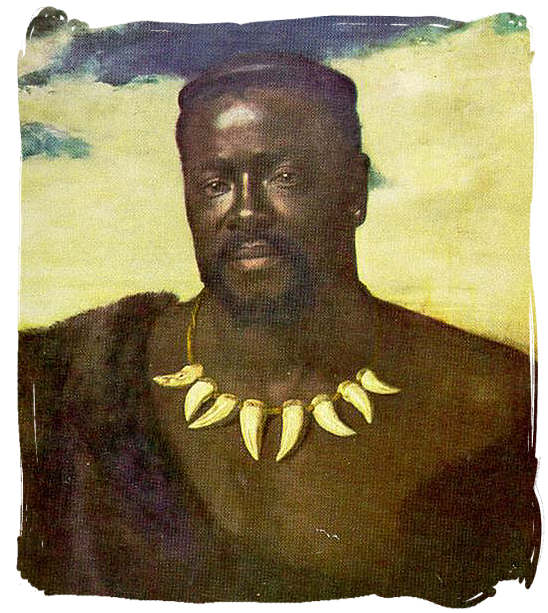
A painting of Cetshwayo kaMpande who was the king of the Zulu nation from 1872 to 1879
The Anglo Zulu war, more about Zulu people and Zulu history
<< Top of Page
Invasion of Zululand,...
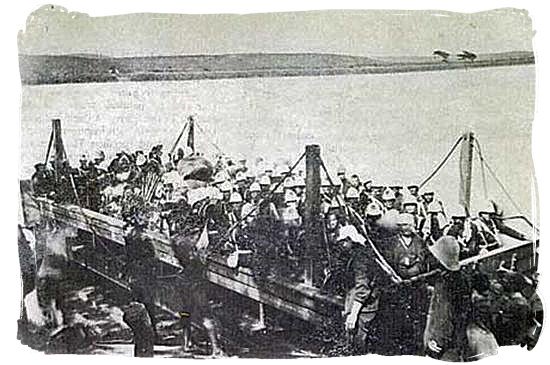
British troops crossing the Tugela River during their advance into Zululand
The Anglo Zulu war, more about Zulu people and Zulu history
On 11 January 1879 British forces entered Zululand under the command of Lord Chelmsford. Used to guerrilla
warfare and expecting similar tactics, they in three columns, North (to the Vryheid area), South to Eshowe
and the largest in the centre between the two others.
The first skirmish was with a local chief at the foot of the mountain and he was easily defeated. Eight
days later they made camp at the foot of the Isandlwana mountain. Not being familiar with Zulu warfare
tactics and being overconfident, Chelmsford did not find it necessary to form a laager. Instead the camp
was strung out along the slopes of the hill.
<< Top of Page
Battle of Isandlwana,...
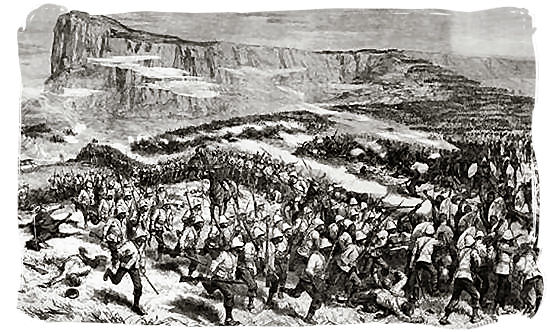
19th century sketch of the Battle of Isandlwana
The Anglo Zulu war, more about Zulu people and Zulu history
In the meantime Zulu king Cetshwayo was spurred into action, despatching 23,000 well-trained Zulu warriors
to meet the British forces. After discovering some forward elements of the Zulu army, Chelmsford took part
of his force and moved out to attack them. After Chelmsford had left, the other part of the British force
that was left behind saw large numbers of Zulu warriors on ridges in entirely the opposite direction from
that in which Chelmsford had left.
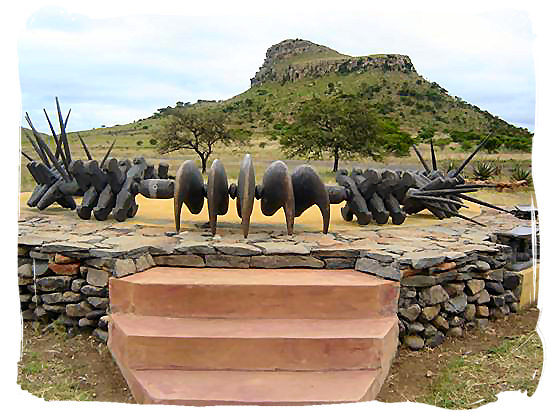
Memorial erected at the site commemorating the fallen Zulu impi at Isandlwana Hill
Shots were fired and the more then 20,000 Zulu’s attacked. The unprotected British encampment was over
whelmed, allowing only a handful of the 1300 British soldiers and their attendants to escape. When
Chelmsford and his men returned from their fruitless search for the Zulu army, stumbling over the dead
bodies strewn across the battle field, they could just see the last of the Zulu soldiers retiring over the
ridge. The defeat at Isandlwana would go down in history as one of the biggest ever suffered by the
British army.
<< Top of Page
Battle of Rorke's Drift,...
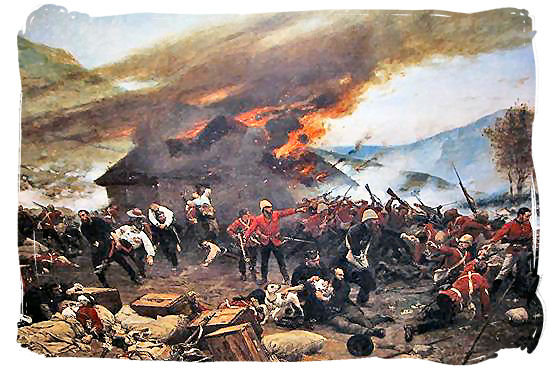
Painting of the Battle of Rorke’s Drift
The Anglo Zulu war, more about Zulu people and Zulu history
The Zulu army had been so successful at Isandlwana, that its reserve force was not even brought into
action. It was this part of the Zulu army that was sent to pursue the handful of British survivors. These
survivors did not get any further then the old mission station of Rorke’s drift, before the Zulu's were
upon them.
Here they joined the British soldiers that were guarding the mission station that now acted as a supply
depot and a small hospital. A fierce battle followed between the 145 defenders of Rorke’s drift and 4,000
Zulu warriors. After ten hours of ferocious fighting, the Zulu’s gave up and just disappeared.
<< Top of Page
Battles of Hlobane - Khambula - Gingindlovu,...
In the meantime the eastern column under Col. Charles Pearson had reached Eshowe. Here they were cut off
and hemmed in by the Zulus, who besieged Pearson’s force for almost three months. Only the northern column
under Col. Evelyn Wood remained operative. Ordered by Chelmsford to create a diversion while an attempt
was being made to relieve the column at Eshowe, they attacked a Zulu stronghold on top of the Hlobane
mountain.
Sketch of the Battle of Khambula, the Zulus on the right are being driven back into the ravine
The Anglo Zulu war, more about Zulu people and Zulu history
The British were surprised by the unexpected presence of the whole Zulu army, and driven off. The next day
the Zulus attacked their camp at Khambula where they were defeated by the British. Meanwhile British forces
had broken through the Zulu cordon around Eshowe in a pitched battle at Gingindlovu, defeating the Zulus
and relieving Pearson and his men.
<< Top of Page
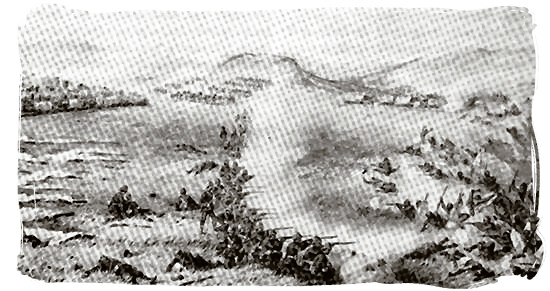
Battle of Ulundi,...
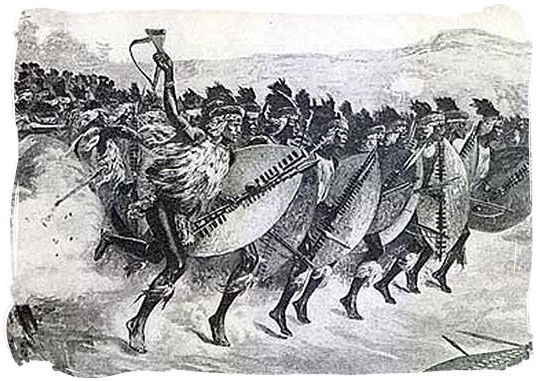
The Zulu warriors on the attack
The Anglo Zulu war, more about Zulu people and Zulu history
Loosing almost half of its forces together with most of the supplies at Isandlwana together with the
misfortunes of the other two columns, brought the British invasion into Zululand virtually to a standstill.
Regrouping and reinforcements were urgently needed. At the same time, exhausted by the heavy losses at
Isandlwana, Zulu king Cetshwayo was unable to mount a counter offensive.
This, together with the demoralising defeats at Khambula and Gingindlovu, proved to be the turning point of
the war. Having received reinforcements, Lord Chelmsford had reorganised his forces and was ready to start
his second invasion into Zululand, which started in late May. Having learned from his defeats Lord
Chelmsford and his men advanced towards the Zulu capital Ulundi, which they reached at the end of June.

The British 17th lancers on the charge in the battle of Ulundi
The Anglo Zulu war, more about Zulu people and Zulu history
On the 4th of July a Zulu army numbering close to 15,000 warriors, attacked the British force of 4166
European and 1005 African soldiers, who were encamped about a mile from Ulundi. The last great battle of
the Anglo / Zulu war ended in a decisive victory for the British, whose losses were about 100, while the
Zulu’s losses came to 1500. The power of the once so proud Zulu nation was broken.
Top of Page
-
Home
›
-
History of South Africa
›
-
The Anglo-Zulu war